Have you ever looked at an empty wine bottle and wondered how you could repurpose it in a creative and unique way? Well, we have the perfect solution for you – drilling a hole in a wine bottle!
With just a few simple steps and some basic tools, you can transform that empty bottle into a stunning piece of decor or a functional item.
In this wine DIY guide, we will show you exactly how to drill a hole in a wine bottle, allowing you to unleash your creativity and give new life to those beautiful bottles. From gathering the necessary tools to safely drilling the hole and finishing the bottle, we will guide you every step of the way.
So grab your drill, put on your safety goggles, and get ready to embark on a wine bottle drilling adventure. Get ready to impress your friends and family with your newfound DIY skills and create something truly remarkable.
Let’s dive in and discover the art of drilling a hole in a wine bottle!
Table of Contents
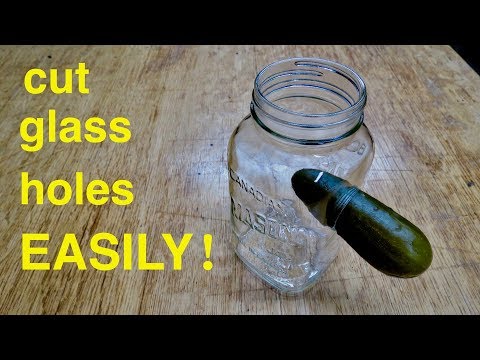
Related Video: "Drill Holes in Glass Easily ● Wine Bottles, Mason Jars ( in under a minute ! )" by Chris Notap
Key Takeaways
- Use diamond-coated drill bits designed for drilling glass
- Gather safety goggles, gloves, and a dust mask for protection
- Remove labels and stickers by soaking in warm, soapy water
– Mark the drill hole location using a template or a small dot
Gather the Necessary Tools and Materials
Before you begin, make sure you have all the tools and materials you’ll need for this project. The first step is drill bit selection. You’ll want to choose a diamond-coated drill bit specifically designed for drilling glass. These drill bits are not only durable but also ensure clean and precise holes in your wine bottle.
Safety precautions are essential when working with glass, so gather safety goggles, gloves, and a dust mask. These will protect your eyes, hands, and lungs from any glass particles that may be generated during the drilling process.
Once you have all the necessary tools and materials, it’s time to prepare the wine bottle. Start by removing any labels or stickers from the bottle. Soak it in warm, soapy water for a few minutes to loosen the adhesive. Gently scrub off any remaining residue using a sponge or scrub brush. Rinse the bottle thoroughly and let it dry completely before proceeding.
Now that you have the wine bottle ready, you can move on to the next step in the process.
Prepare the Wine Bottle
Once you’ve readied your vessel for transformation, it’s time to embark on the journey of preparing the majestic glass orb.
The first step in preparing the wine bottle is to remove any labels that may be present. This can be done by soaking the bottle in warm, soapy water for a few minutes. After soaking, use a scrub brush or sponge to gently scrub away the label. If the label is stubborn, you can use a small amount of rubbing alcohol to help dissolve the adhesive.
Next, it’s important to deal with any glass shards that may be present on the bottle. When drilling a hole in glass, it’s inevitable that small shards will be created. To prevent any accidents or injuries, make sure to carefully inspect the bottle for any sharp edges or shards. You can use a fine-grit sandpaper or a file to smooth out any rough areas.
With the labels removed and the glass shards dealt with, you are now ready to mark the drill hole location. This will ensure that the hole is drilled in the right spot and at the desired size.
So, let’s move on to the next step and learn how to mark the drill hole location for your wine bottle transformation.
Mark the Drill Hole Location
Now that you’ve prepared the majestic glass orb, it’s time to pinpoint the perfect spot to create your masterpiece by marking the location for the drill hole. To ensure accuracy, using a template is highly recommended. You can easily create a template by cutting out a piece of paper or cardboard in the shape of the desired hole size. Place the template on the wine bottle, aligning it with the desired spot, and secure it in place with tape. The template will serve as a guide for the drill and help you achieve the precise location you want.
If you don’t have a template, there are alternative methods for marking the drill hole location. One option is to use a permanent marker or a piece of tape to mark a small dot on the bottle. Make sure to measure and mark the spot accurately before proceeding. Another method is to use a diamond-tipped glass cutter to create a small scratch on the bottle’s surface. This scratch will act as a guide for the drill bit.
With the drill hole location marked, it’s time to move on to the next step of this wine DIY guide: drilling the hole safely and carefully.
Drill the Hole Safely and Carefully
Be cautious as you embark on this delicate step, ensuring the path you carve is steady and precise, like a gentle brushstroke on a canvas. Safety precautions for drilling into glass are crucial to prevent accidents and ensure a successful outcome.
First and foremost, it’s essential to wear safety goggles to protect your eyes from flying glass fragments. Additionally, consider using gloves to shield your hands from potential cuts or burns caused by friction.
When it comes to choosing the right drill bit for glass drilling, opt for a diamond or carbide-tipped bit specifically designed for this purpose. These bits have a sharp and durable cutting edge that can effectively penetrate the glass without causing cracks or shattering.
Start by placing the bottle in a stable position, ensuring it won’t roll or move during the drilling process. Apply gentle pressure and maintain a slow drilling speed to avoid overheating the glass. Remember to periodically pause and cool the bit by dipping it into a container of water.
With the hole safely drilled, it’s time to clean and finish the bottle. Transitioning into the subsequent section, you can now proceed to give the bottle a thorough cleaning and add any decorative touches you desire.
Clean and Finish the Bottle
Ensure the bottle sparkles with pristine clarity as you meticulously polish it to perfection. Cleaning and finishing the wine bottle is an essential step in repurposing it for creative purposes. Before you begin, make sure the bottle is completely dry and free from any residue or debris.
To remove labels from wine bottles, start by filling a sink or basin with warm water and a few drops of dish soap. Place the bottle in the water and let it soak for about 30 minutes. This will help loosen the adhesive and make it easier to peel off the label. After soaking, gently scrub the bottle with a sponge or brush to remove any remaining residue. For stubborn labels, you can use a mixture of baking soda and water to create a paste and scrub it onto the bottle.
Once the label is removed, it’s time to give the bottle a final polish. Use a glass cleaner or a mixture of vinegar and water to clean the inside and outside of the bottle. A microfiber cloth or a lint-free cloth works best for this task, as it’ll prevent streaks and leave the bottle sparkling.
By following these tips for removing labels and cleaning the bottle, you’ll have a pristine canvas ready for your creative endeavors. Whether you want to turn it into a beautiful vase, a unique candle holder, or a charming centerpiece, the possibilities are endless. Get ready to unleash your creativity and give new life to old wine bottles!
Frequently Asked Questions
Can I use any type of drill for drilling a hole in a wine bottle?
Yes, you can use different types of drills for wine bottles. However, it is important to take safety precautions. Ensure you have a drill bit suitable for glass, wear safety goggles, and go slow to avoid cracking the bottle.
Is it necessary to wear protective eyewear while drilling a hole in a wine bottle?
It is crucial to always wear protective eyewear when drilling a hole in a wine bottle or any DIY project. Safety precautions, especially when working with glass materials, are of utmost importance to prevent eye injuries.
How do I prevent the wine bottle from cracking or shattering while drilling?
To prevent cracking while drilling a hole in a wine bottle, start by applying masking tape over the area you want to drill. Another method is to use a diamond drill bit with a slow speed and gentle pressure.
Can I use a regular glass drill bit or do I need a specific type for drilling a hole in a wine bottle?
To drill a hole in a wine bottle, you need a specific glass drill bit. Regular ones won’t work. There are various drilling techniques you can use, and alternative tools like a diamond hole saw can also be effective.
Are there any alternative methods to drilling a hole in a wine bottle if I don’t have access to a drill?
If you find yourself without a drill, fear not! There’s a nifty alternative method to drill a hole in a wine bottle. Simply heat up a nail and carefully pierce the bottle, creating a hole.

