Are you ready to uncork your creativity and learn how to draw a wine glass? Grab your pencil and get ready to embark on a step-by-step tutorial that will bring this elegant stemware to life on your paper.
Drawing a wine glass may seem like a daunting task, but fear not! With this detailed and informative guide, you’ll be sipping success in no time.
By breaking down the process into simple steps, we’ll guide you through the art of creating a wine glass masterpiece. Starting with basic shapes, we’ll help you build a solid foundation for your drawing. From there, we’ll refine the details, adding depth and dimension to your glass.
Whether you choose to add color or shading is up to you, as we’ll provide tips for both techniques. Finally, we’ll walk you through the final touches that will truly make your wine glass shine.
So, grab a glass of your favorite vintage and let’s toast to your artistic journey. Let’s get started on drawing the perfect wine glass!
Table of Contents
Related Video: "How to draw a Wine glass step by step for beginners" by EASY DRAWINGS NET [Made with lot of Love]
Key Takeaways
- Study and observe different glass shapes
- Sketch the outline with basic shapes
- Add texture and reflections for a realistic look
– Enhance the drawing with color or shading
Gather Your Materials
Now let’s gather all the materials you’ll need to create your own stunning wine glass masterpiece!
To start, you’ll need the right paper and pencil. Make sure to choose a high-quality drawing paper that can handle the shading and blending techniques you’ll be using. A heavier weight paper will also prevent any smudging or tearing.
As for the pencil, a medium softness is recommended, such as a 2B or HB, as it’ll give you the right amount of control and flexibility.
Once you have your materials ready, it’s time to explore different glass shapes. Wine glasses come in various styles, so take some time to study and observe different designs. Look at the stem, bowl, and base of the glass, noticing the curves and proportions. This will help you understand how to accurately represent the glass in your drawing.
Now that you have your materials and have explored different glass shapes, you’re ready to move on to the next step. Start with basic shapes to sketch the outline of the wine glass. By breaking it down into simple geometric forms like circles and cylinders, you can establish the overall shape and structure. With this foundation in place, you can then add the details and refine your drawing.
Start with Basic Shapes
First, you’ll want to begin by sketching out some simple shapes. These basic shapes will serve as the foundation for your wine glass drawing.
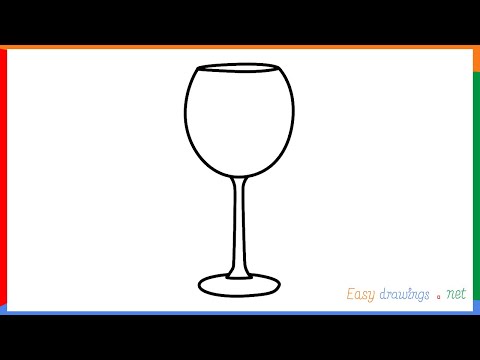
Start by drawing an oval shape for the base of the glass. This oval should be slightly elongated to give the glass a more elegant look.
Next, draw a tall, curved line above the oval to represent the stem of the wine glass.
Finally, draw a larger oval at the top of the stem to create the bowl of the glass.
When starting with basic shapes, it’s important to keep in mind some drawing techniques to achieve the desired outcome. Use light, gentle strokes to create the shapes, as this will make it easier to erase and refine later on. Additionally, pay attention to the proportions of the shapes to ensure that the glass looks realistic.
Common mistakes when drawing the basic shapes include making the stem too thick or too thin, or making the bowl of the glass too large or too small. Take your time and carefully observe the reference image or real-life wine glass to get the proportions right.
Now that you have the basic shapes in place, you can move on to refining the details and adding more realistic elements to your wine glass drawing.
Refine the Details
To bring your wine glass drawing to life, start by adding intricate details that will make it stand out. Adding texture and reflections will give your drawing a realistic and three-dimensional look.
To add texture to the glass, start by lightly sketching horizontal and vertical lines on the surface. These lines should follow the shape of the glass and create the illusion of shine and smoothness. Use short, quick strokes to create a sense of depth and dimension.
Next, focus on adding reflections to the glass. Identify the light source in your drawing and imagine where the reflections would appear. Use curved lines to depict the reflections, making sure they follow the shape of the glass. These reflections should be lighter in value than the surrounding areas to create a contrast and make them stand out.
Incorporate a 3 column and 4 row table in markdown format into the section to add a level of sophistication to the writing.
| Texture | Reflections |
|---|---|
| Sketch horizontal and vertical lines | Identify light source |
| Follow shape of the glass | Imagine reflection placement |
| Use short, quick strokes | Use curved lines |
| Create depth and dimension | Make reflections lighter in value |
By adding these intricate details, your wine glass drawing will look more realistic and visually appealing. Next, we will explore how to add color or shading to complete your artwork.
Add Color or Shading
Enhance the visual appeal of your wine glass masterpiece by infusing vibrant colors or subtle shading, immersing your artwork in a captivating world of depth and dimension that will leave your audience in awe.
Choosing the right color palette for your wine glass drawing is crucial to achieve a realistic and striking effect. Consider the type of glass you’re drawing and the lighting conditions. For a clear glass, opt for transparent colors like blues and greens to represent the reflections and refractions. If you want to create a colored glass, select a palette that complements the overall composition. Experiment with different shades and tones to add depth and dimension to your artwork.
To add realistic shading to your wine glass illustration, start by identifying the light source. Determine which areas will be in shadow and which will be highlighted. Use a combination of hatching and cross-hatching techniques to create the illusion of volume. Gradually build up layers of shading, starting with lighter tones and gradually adding darker ones. Pay attention to the contours of the glass and the way light interacts with its surface. This will help you achieve a three-dimensional effect.
Now that you’ve added color or shading to your wine glass, it’s time to finalize your drawing by refining the details.
Finalize Your Drawing
Now that you’ve added color or shading to your wine glass masterpiece, it’s time to put the finishing touches on your drawing and bring it to life.
Start by adding reflections and highlights to make your wine glass look shiny and realistic. To do this, identify the light source in your drawing and imagine where the light would hit the glass. Use a white pencil or eraser to carefully add small, bright spots on the glass where the light would reflect. This will create a sense of depth and dimension.
Next, consider creating a background for your wine glass drawing. This will help set the scene and provide context for your artwork. You can choose to draw a simple background, such as a table or a window, or you can get creative and draw a beautiful landscape or a cozy wine cellar. Remember to keep the background relatively simple, so it doesn’t distract from the main focus of your drawing.
After adding reflections and creating a background, take a step back and evaluate your drawing. Look for any areas that need touch-ups or adjustments. Pay attention to details such as the shape and proportions of the glass, the placement of the stem, and the overall balance of the composition. Make any necessary corrections to ensure a polished and professional-looking final result.
Once you’re satisfied with your drawing, consider signing it to add a personal touch. Use a fine-tip pen or marker to carefully write your signature in a corner or along the bottom of the drawing. This will not only add a sense of authenticity but also make your artwork feel complete.
Congratulations! You’ve successfully finalized your wine glass drawing. Take a moment to appreciate your hard work and enjoy your finished masterpiece.
Frequently Asked Questions
How do I create realistic reflections on the wine glass?
To create realistic reflections on the wine glass, you’ll need to master the art of creating glass textures. Use light and shadow effectively to give the glass a three-dimensional look. It’s all about capturing the play of light and the subtle variations in transparency.
What are some common mistakes to avoid when drawing a wine glass?
To ensure proper proportions, start by sketching a vertical line for the glass’s center. Avoid overly symmetrical shapes by slightly curving the lines and adding subtle variations to the curves. This will make your wine glass drawing look more realistic.
Can I use colored pencils instead of markers for adding color to my drawing?
Yes, you can use colored pencils instead of markers for adding color to your drawing. Colored pencils are great for shading and blending. The pros of using markers are vibrant colors and quick application, while colored pencils offer more control and layering options.
Are there any tips for achieving a three-dimensional effect on the wine glass?
To achieve a three-dimensional effect on the wine glass, use shading techniques. Start by lightly shading the areas that are farther away, then gradually darken the areas closer to you. Add highlights with a lighter color to create depth and dimension.
How can I create a sense of transparency in the wine glass?
To create a glass-like texture, ironically, avoid drawing any lines or shading. Instead, leave the area blank to give the illusion of transparency. Add shadows strategically to create depth and enhance the glass’s realism.

