Are you a wine enthusiast looking for a unique way to display your collection? Look no further than a DIY wine rack! Creating your own wine rack not only allows you to showcase your favorite bottles, but it also adds a touch of personalization to your home decor.
In this article, we will guide you through the easy steps of making your own wine rack, from gathering your materials to displaying your finished creation.
Like a master winemaker crafting the perfect blend, you too can become a master craftsman with just a few simple tools and materials. With our step-by-step instructions, you’ll be amazed at how easily you can create a functional and stylish wine rack that will impress your guests and elevate your wine-tasting experience.
So, roll up your sleeves, grab your tools, and let’s get started on this exciting DIY project. Cheers to your newfound woodworking skills and the joy of sipping your favorite wines in a stunning display!
Table of Contents
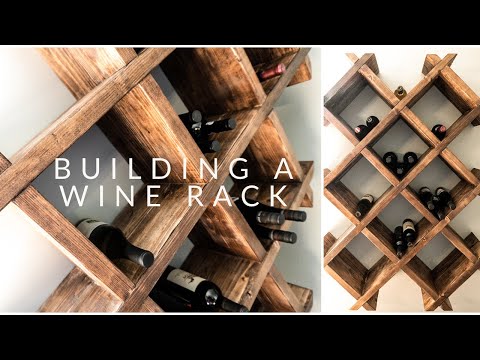
Related Video: "HOW TO BUILD A WINE RACK | Step by Step Process" by John Dolechek
Key Takeaways
- Choosing the right wood and paint for durability and aesthetic appeal is essential in creating a functional and stylish DIY wine rack.
- Incorporating personal touches such as carvings, finishes, stains, and paints can add unique design elements and decorative accents to the wine rack.
- Cutting and assembling pieces with precise measurements and secure joints, using techniques like mortise and tenon or dowel joints, ensures strength and durability of the wine rack.
– Adding alternative wine storage options and organizing wines by region, varietal, or vintage can enhance the versatility and functionality of the DIY wine rack.
Gather Your Materials and Tools
Before you dive into creating your very own DIY wine rack, it’s crucial to gather all the materials and tools you’ll need for this exciting project.
Choosing the right wood and paint for your wine rack is essential to ensure both durability and aesthetic appeal. Opt for a sturdy wood like pine or oak that can support the weight of your wine bottles. Consider the size and style of your wine rack, as well as your personal preferences, when selecting the type of wood. Additionally, think about the type of paint or stain you want to use to enhance the look of your wine rack. You can go for a classic and elegant look with a dark stain, or add a pop of color with a bold paint choice.
Personalizing your wine rack with unique design elements is a great way to make it stand out. You can add decorative accents, such as metal or glass inserts, to give your wine rack a touch of sophistication. Another option is to incorporate a unique pattern or design into the wood itself using a woodburning tool or stencils. Get creative and let your personality shine through in your design choices.
Now that you have gathered all your materials and tools, it’s time to move on to the next step: measuring and planning your design.
Measure and Plan Your Design
Once you’ve determined the dimensions of your desired design, you’ll be amazed to discover that a well-planned wine rack can hold up to 50 bottles at a time.
When choosing the right wood for your DIY wine rack, there are a few tips to keep in mind. First, consider the durability and strength of the wood. Hardwoods like oak, maple, or cherry are excellent choices as they can withstand the weight of multiple wine bottles without warping or breaking. Additionally, make sure the wood is properly dried and free from knots or defects that could compromise the stability of your rack.
Now it’s time to add a personal touch to your wine rack design. Consider incorporating decorative elements such as intricate carvings or unique finishes to make your wine rack stand out. You can also experiment with different stains or paints to match your existing decor or create a striking contrast. Don’t be afraid to get creative and think outside the box!
With your measurements and design ideas in hand, you’re ready to move on to the next step – cutting and assembling the pieces. This is where your careful planning will pay off, as precise cuts and secure joints will ensure a sturdy and functional wine rack.
Cut and Assemble the Pieces
To create a refined and elegant wine rack, start by expertly cutting and skillfully assembling the pieces. Woodworking techniques play a crucial role in ensuring the stability and aesthetic appeal of your wine rack. It’s important to measure and mark your cuts accurately to achieve precise dimensions. With the right tools and a steady hand, you can effortlessly create the necessary components for your wine rack.
Next, assemble the pieces using sturdy joinery methods such as mortise and tenon or dowel joints. These techniques will provide strength and durability to your wine rack, ensuring it can safely hold your precious bottles. As you assemble the pieces, refer to a detailed plan or blueprint to ensure proper alignment and fit. Take your time to make adjustments as needed, ensuring a seamless and visually pleasing final product.
To add depth and complexity to your wine rack, consider incorporating alternative wine storage options. A table below showcases different design ideas, including hanging wine glass holders, built-in wine bottle holders, and adjustable shelving. These features can elevate the functionality and versatility of your wine rack, allowing you to customize it to your specific needs and preferences.
As you complete the cutting and assembly process, you’re one step closer to showcasing your craftsmanship. The next section will guide you through the process of sanding and finishing your wine rack, adding the final touches that will bring out the natural beauty of the wood and protect it for years to come.
Sand and Finish Your Wine Rack
Now that you’ve expertly cut and skillfully assembled the pieces, what are the next steps to sand and finish your elegant wine rack? It’s time to bring out the beauty of the wood and make it shine.
Start by using the right sanding techniques to achieve a smooth and flawless finish. Begin with a coarse-grit sandpaper to remove any rough edges and imperfections. Then, move on to a finer grit to create a polished surface. Remember to sand in the direction of the wood grain for the best results.
Once you’ve achieved the desired smoothness, it’s time to choose the perfect stain to enhance the natural beauty of the wood. There are various staining options available, from light and natural tones to rich and dark hues. Take into consideration the style of your space and the overall aesthetic you want to achieve. Test the stain on a small, inconspicuous area first to ensure it matches your vision.
After applying the stain, allow it to dry completely before adding a protective finish. This will not only add a glossy sheen but also protect the wood from moisture and damage. Consider using a clear varnish or polyurethane for a durable and long-lasting finish.
With your wine rack sanded and beautifully finished, it’s time to move on to the next step of display and enjoy your wine collection.
Display and Enjoy Your Wine Collection
Get ready to showcase and savor your impressive wine collection with a stylish display that’ll make your friends and guests envious.
With the right wine storage options and wine tasting essentials, you can create an inviting and sophisticated ambiance that highlights your love for wine.
Here are four key elements to consider when displaying and enjoying your wine collection:
- Wine rack placement: Choose a prominent spot in your home where your wine rack can easily be seen. This could be in your dining room, kitchen, or even a dedicated wine cellar. Ensure that the location is away from direct sunlight and vibrations to maintain the quality of your wines.
- Wine rack organization: Arrange your wines in a way that’s visually appealing and easy to access. You can organize them by region, varietal, or even by vintage. This not only looks great but also makes it convenient when selecting a bottle for a special occasion.
- Wine accessories: Enhance your wine display with essential accessories such as a corkscrew, wine glasses, and decanters. These items not only add a touch of elegance but also make the wine tasting experience more enjoyable.
- Wine tasting events: Host wine tasting events to share your passion for wine with friends and family. Create a cozy ambiance with soft lighting, comfortable seating, and a selection of cheeses and fruits to complement the wines. This will not only showcase your collection but also create memorable experiences for your guests.
With these tips, you can transform your wine collection into a captivating display that’s both functional and aesthetically pleasing. So, go ahead and create a wine showcase that’ll impress and delight all who visit your home.
Frequently Asked Questions
How do I properly store my wine bottles in the rack to ensure they are kept at the ideal temperature?
To store your wine bottles in the rack at the ideal temperature, ensure they are stored vertically. This allows the wine to maintain proper cork moisture. The wine rack’s temperature control will further help preserve the flavors and aromas of your wine.
Can I customize the size of the wine rack to fit a specific space in my home?
Yes, you can customize the size of the wine rack to fit any specific space in your home. With various customization options available, you can create space-saving solutions that perfectly suit your needs and style.
What type of wood is best for building a wine rack?
For the best wood choice, oak is like the reliable friend who ages gracefully. Its sturdy structure and natural beauty make it perfect for a wine rack. If you want alternatives, pine and mahogany are also great options.
Are there any safety precautions I should take while cutting and assembling the pieces?
To ensure your safety while cutting and assembling the pieces of your DIY wine rack, it is important to use the necessary tools and equipment, handle sharp objects with care, wear protective gear, and secure your work area.
Can I add additional shelves or compartments to the wine rack design?
You can definitely add more shelves or compartments to the wine rack design. Get creative and explore additional storage options to suit your needs. Consider using alternative materials for shelves to add a unique touch to your wine rack.

